I barely know what I’m doing. I write those words of caution to anyone who thinks I have some level of expertise, experience, or credentials when it comes to these Fix-It Man! articles on Do-It-Yourself (DIY) projects. The garbage disposal article, the washing machine article, and this article were written from the dumb guy’s perspective of fixing various things around the home. This dumb guy’s perspective has been informed by the DIY YouTube guys and some “you’re doing it wrong” friends. The “you’re doing it wrong” friends have offered me some tips on how to fix what needs fixing, and I thought some of my fellow dumb guys might appreciate me passing those tips along. It is also written from the perspective of someone who got tired of calling in the experts who charge us for every visit, regardless if they actually do nothing more than switch something on. If you’re reading this for some level of expertise, “you’re doing it wrong”.
During my 20+ years of living in apartments, and never having to fix anything myself, I heard all the talk about how to best take care of a lawn, fix and/or replace an appliance, and all the tips on how best to renovate or modernize a home. I didn’t listen. It bored me so much that I tried to change the subject, but I wish I listened a little bit, now, because I’ve now done all of the above, and it’s embarrassing how little I know.
Heating, Ventilation, and Air-Conditioning (HVAC)
 Every time we called an HVAC guy in, they checked two things. They checked the air filter inside our home, on the interior portion of our HVAC unit (furnace and air conditioner), and then they checked how dirty the outside portion of our HVAC unit (the condenser) was. One rule of thumb they taught us with the air filter is to hold it up to the light. If we can see light, it should be okay. This is far from an exact science, but it gives us a better idea how dirty our filter is. Dirty is dirty, but it’s mostly a judgment call. Most HVAC guys suggest changing the air filter quarterly (every three months), and they suggest we write the date of installation on our new filter with a Sharpie to help us keep track of how often we change it. This quarterly suggestion is relative to the size of the house, how many live in the home, if you have pets, if anyone in your home has allergies, how often you use the HVAC, and the general air quality of your home. Some HVAC specialists say the rate of changing filters is so relative to all these conditions that they suggest we, at least, check it once a month, until we get a feel for how often we need to change it. I’ve found that it often depends on the season. The Fall and Spring require changing it less often, and the Summer and Winter require changing it more frequently, obviously indicating greater usage of the heating and air-conditioner. When installing a new air filter, make sure that the arrows on the filter point in the proper direction. Each filter will come equipped with an arrow on it, make sure it’s pointed in the correct direction. Make sure that arrow is pointed toward the HVAC.
Hosing down the outside portion of the HVAC unit (the condenser) requires less frequency, but that thing can get clogged. The vent gets clogged with a mass of everything including pollen, grass clippings, and dirt. The fibers of the vent are called fins. As you will see if you touch the fins, as I’ve done on my unit, they’re very sensitive, and if you collapse them in anyway, air won’t get through. So, you shouldn’t wipe them down, as you’ll collapse the fins. (Quick note: There is a product called a fin comb that allows us to try to straighten out collapsed fins.) The condenser’s main job is to pull in air and cool it off, so when it “pulls,” it drags everything loose into the unit. The fins are positioned to keep as much as they can off the central unit, and as you can imagine this can cause them to become clogged. If you don’t want to take the time involved in using a fin comb, take a hose and wash the muck off the fins at an angle that prevents the water from getting into your unit. Avoid spraying or using any degree of force with the water to prevent fin collapse. Use a low water flow at an angle, so you don’t get water in the unit, to bring all that stuff down, and water, or finger, out the bottom where all the muck collects.
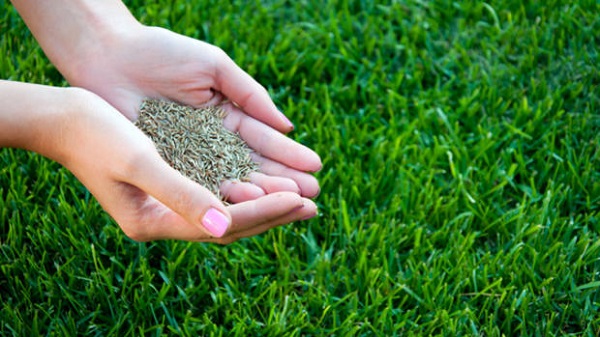
Weed, Seed, and Feed.
 “How do you keep your grass so beautiful?” neighbors ask. There’s no super-secret formula, miracle cure, or homeopathic remedy here. Everyone is looking for that no labor, quick-fix that some other guy knows. I don’t know if this is nothing more than fellas standing in a lawn, with a beer in hand, conversation, or if they’re actually asking me for tips. If you go to your lawn expert store, one of the more seasoned representatives will tell you, it’s less about that high-priced ingredient and more about consistency. They’ll tell you that the secret to a successful lawn involves four things: Seeding your lawn, Weeding it, Feeding, and watering. (Some suggest that there is no such thing as over-seeding a lawn, and that the best way to prevent weeds is to seed so much and so often that you don’t leave room for the weeds to grow, and over-seeding might actually promote healthier growth. If we over-seed, they suggest, we might be able to dispense with using the weed killers.) They suggest seeding between mid-spring and mid-Summer. As for weed killer, most experts agree that spring or fall are the best time to attack weeds, as their roots are at their weakest point during these times.
When it comes to mowing, the age-old debate is to bag or not to bag grass clippings. Most of those who appear to know what they’re talking about suggest leaving the bag off. It is messier, but it allows the grass clippings to decompose between the blades of grass and feed the grass and the soil with the nutrients from their decomposition. The two caveats here are that non-bagging it not only spreads grass clippings, it spreads weed seeds. The non-bagger also needs to watch to make sure that the clumps that can occur when mowing high grass or wet grass doesn’t cover the grass so much that it prevents your grass from getting Sun. Clumps can also suffocate grass and result in those dreaded brown patches. When it happens, I either kick small clumps around to break them up, or if there is such a large line of excess grass I go over them with a weed eater or a leaf blower.
Another related topic is dog dung, “Doesn’t it act like a fertilizer? I mean, isn’t that what fertilizer is made of?” a friend asked when he saw me picking it up. It can act as a fertilizer, if you grind it up and put it between the grass blades, but I’m guessing you’re not going to do that. When a huge clump of dog dung sits atop the grass, it acts as a huge clump of grass, blocking the Sun and suffocating the grass, leaving brown patches. The logical conclusion to this paragraph is, the secret to a successful lawn involves a lot of hard work. If you do it, you know it’s not hard, it’s never hard. It’s just constant and repetitive maintenance and routine.
It’s Clogged
 Is your toilet, sink, bathtub, etc., constantly backing up on a semi-regular basis? Miracle cure here. If you attended your incredibly boring eighth-grade science fair, one of your classmates created the requisite volcano exhibit. They constructed a makeshift volcano, and to create the image of lava pouring out, they created a concoction of four parts baking soda in with two parts distilled vinegar. If they were truly ambitious, they added an orange-colored tablet to affect an orange color. This concoction, sans the orange-colored tablet, can also clear your drain. You might need a heaping amount of baking soda, four cups are often suggested, coupled with two cups of distilled vinegar. The sites also suggest topping this off with a pot of boiling water (no specific measurement). The sites usually declare this as an excellent preventative measure, but it will probably not unclog a major blockage. They suggest that a once-a-month solution might help keep everything in your drains clean and flowing.
Drain the P-Trap
I don’t know what I’m doing, and all of this stuff is so new to me, and there’s so many things to know and learn.
Our basement flooded regularly. How regularly? We didn’t completely figure that out, until it happened four times in four weeks. As with every investigation, finding the culprit involved a process of elimination. Our washing machine was dripping inside the machine. Culprit #1. I turned off the water supply to the washer, and it flooded again. It didn’t make sense that the washing machine would flood with the water supply turned off, but it flooded again, so we changed the inlet valve. When we flooded a third time, we gave serious consideration to replacing suspected culprit #2: our 40-year-old freezer. Most of the flooding water pooled at the bottom of the freezer, but it was fully operational. It just didn’t make sense that our freezer would be fully operational and flooding that much water.
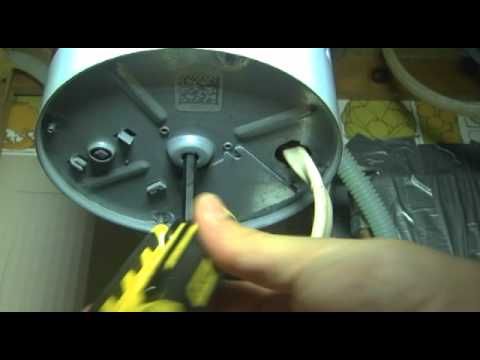
Our next guess was culprit #3: the water purification system. When our water purification system regenerates, it takes the old water out of the system and replaces it with new, filtered water. It is set to regenerate every Friday morning. The three incidents of flooding occurred every Friday morning. One plus one equals solution. The problem with that was that our purification system has spewed such water every Friday since we purchased it one year ago. Was the purification system sending out too much water? Answer: who cares, or it should not matter in this investigation. The water should still find a way out.
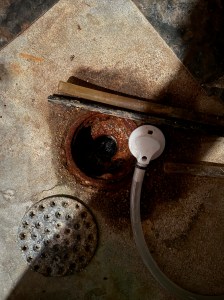 Culprit #5: Our basement floor drain, otherwise known as the P-trap was not draining as fast as it should. The first solution DIY guys submit is the four-parts baking soda, two-parts distilled vinegar, followed by a big vat of boiling water. We tried the first solution of course. Big mistake, in this case. The baking soda did nothing but stop up that drain. We then compounded our mistake by pouring a half a container of Drano atop the mess sitting atop the baking soda. Big mistake #2, and that led us to our third mistake, we should’ve used the drain snake first, before using all of the other solutions.
The first course of action, at this point, was to attempt to recover from our first two mistakes. To do that, I tried several subtle, strategic methods: Nothing. None of them worked. So, I decided to try a far less glamorous method. I decided to smash the snot out of the baking soda crystals. I took a broom handle and mashed the snot out of it for about ten minutes, and the dramatic and glorious swirl down the drain began. “Some of the times, we approach matters with subtle, strategic methods, and some of the times, we just need to use brute force,” I said. We then approached the slow drain with equal amounts of brute force by snaking the drain. Snaking a drain might sound strategic and subtle, but if you do it right, your triceps and forearms should burn a little by the time you’re done. Put the snake drain wire in as far as you can until you reach a stopping point. At that point, you’ll want to keep the wire between the drain and your snake taut, so it doesn’t bend when you mash. Then turn the screw at the bottom of the snake, until it prevents more wire from coming out. Turn the handle, then jiggle and jam that snake, as you might with a handsaw. You should be turning that handle and mash it with all your might as often as it takes, until the wire between your snake and the drain goes limp. Unscrew the screw to release more wire, until you encounter another blockage and repeat the process until your drain is clear.
I appeared to have cleared the drain. I poured about five gallons of boiling water down it, followed it up with a generous portion of dishwashing soap, and I even tried draining the water in our basement drain with a wet vac. The latter two steps would prove unnecessary, as the drain proved to be draining at a relatively pleasing rate. There was one problem, as far as I was concerned. The water drained, but some water remained atop the drain, stubbornly mocking me. I snaked for another half-hour, and the snake went in to its extent, ten feet. I pushed it in, pulled it out, and danced it all about, but the water remained. In my battles with DIY-home fixings, my pride is no longer on the line. I enter each challenge of my manhood, knowing that I am the Western Kentucky Hilltoppers stepping onto the gridiron against the Alabama Crimson Tide. So, I continued to snake, pour about five gallons of boiling water down it, followed with a generous portion of dishwashing liquid. I even tried emptying the water from the drain with a wet vac. That worked, the drain was clear, but the minute I poured water into that drain, a small amount remained at the top.
Here’s the takeaway that I didn’t know until today, and if you take nothing out of this section, remember this. The basement floor drain, sometimes called a P-trap, is supposed to retain some water at the bottom of the trap—the same as with all other drain traps in your home. The geniuses who created the P-trap designed it to keep some water in it to prevent sewer gases from seeping into our homes. I’ll admit that I never considered the idea that there was something keeping sewer gases, sometimes explosive gases, from entering my home, because this is one of the elements of life that we just take for granted. If I told you, for example, that a man named Alexander Cumming invented the P-trap, or patented it in 1775, would you care? I know I wouldn’t care prior to today, but I now have a level of appreciation for the ingenious maneuver that I would’ve taken for granted for every day of my life until today.
Due to the design and purpose of this P-trap, you should only worry if it is dry. Doesn’t go against everything you thought you knew about plumbing prior to today?
Fear of the Hymenoptera
If you want to see friends, grown men, run for cover, nearly knock pregnant women over, and all but squeal, yell: “BEE!” I don’t know if we base our exaggerated fears on the much-talked about bee allergies, “If a bee stings me, I could die, if I don’t have an EpiPen available.” I’m sure there’s some truth to this, but I doubt it’s as prevalent as the squealers suggest. My guess is that their hysterical reaction is mostly based on some holdover from the childhood trauma of being stung for the first time. I don’t care how scared, unmoved, or fearless you are, stings and bites hurt, particularly when we’re young. It can also be scary and shocking to learn, for the first time, how bad these stings and bites hurt. It can be so shocking that it leaves a psychological mark for which some of us never fully recover. Seeing them, rally seeing those faces for the first time, in a book or magazine, does nothing to quell our fears. Their alien faces might only add to those fears. “There’s all these things flying around my lawn, trying to sting me?” It makes us feel unsafe as kids. Add to that that every kid we know is just as afraid of them as we are, and one kid has that story about how his cousin Peter got stung by a whole mess of them, and his face swelled up like a balloon, “and he almost died!” So, when we were young and got stung, we were the talk of the town in our little kid corners. It also hurt really bad, and that pain seemed to last a couple of days, until we grew to sprinting and squealing adults who almost knocked a pregnant woman down.
 I don’t fear all of the flying things that belong to the order of insects called the Hymenoptera, including the bee, the wasp, and the hornet, but I have oodles of respect for them. That respect is also on a sliding scale that can, at the upper reaches, lead to some level of fear. If a honeybee flies near me, I’ll respectfully swoosh it. In my experience, this teaches the average honeybee that I’m not a landing spot, and they respectfully fly away. I have developed a ‘you don’t bother me, and I won’t bother you’ relationship with the honeybee that has served us both well. This holds true, for the most part with the bumblebee. In my experience, honeybees and bumblebees don’t want to sting us. If we unwittingly or not, threaten them, their nest, or their people, they’ll sting, but that is not their goal in life. My friends drive the threat level to ten on anything in a black and yellow uniform, but I don’t regard their threats as uniform. Depending on the circumstances, I regard the honeybee as a level one threat, the bumblebee a three, and the wasp and hornet a level seven threat.
Yell, “Wasp,” and I will turn and attempt to locate. I will then swipe with greater respect and a level of caution that borders on fear. That threat level does rise when scared young children and women are in the area, of course, but other than that, I swipe respectfully, move to the other side of the room, keep my eye on them throughout, and exhale when they fly away.
If we’re being all rational, factual, and science-y, we all have to admit that neither the hornet or the wasp want to sting a human. Read an expert, and they’ll tell us that no matter what we think of them, or what experiences we’ve had, stinging us is not their raison d’etre, or their reason for being, the modus operandi, or their goal in life. Those are the facts. It just doesn’t feel that way. I know some tough and rugged men who haven’t run in years, who will break out into a tiny sprint at the sight of a wasp or hornet. We might not share much in our ways or life, or in conversation, but we both know/think that the hornet is can be an unreasonably nasty character who is out to get us. It’s not a fact, but compared to the honeybee it sure feels that way. Wasps can be ornery little beings with little fear of the human, and hornets can be downright nasty. If you yell “Wasp!” you’ll definitely get my attention, but if you yell, “Hornet!” you won’t get squealing, or nearly knocking pregnant women down, but you’ll definitely get a greater emotional (based on childhood trauma and pain) reaction out of me. It does seem to me that they are more prone to sting people for reasons we can’t figure out.
If I find evidence of a honeybee nest on my property, I’ll do what is necessary to inform them that this is not an adequate place for their nest. Evidence, and repetitive evidence, of wasps or hornets on my property requires immediate attention. Have you ever heard the fact that the bee, the wasp, and the hornet send out distress pheromone signals to their mates? The whole idea sounds a little terrifying to me. The process plays out like this, you try to kill a wasp that is bothering you, the wife, or the child. You harm, almost kill it, or kill it in a way that causes it to die slowly. It sends out a distress signal, and all brothers, cousins, and other extended members fly in to sting you for a severe violation of the bee, wasp, or hornet code, nest, or the threat of doing damage.
The threat of being stung, the threat of the pheromone, and the subsequent fear of being stung a lot more, led me to try to rid my lawn of a wasp nest by trying two ingenious steps. I don’t know if we should call this a home remedy, or a miracle method of ridding your property of a wasp nest, but I tried it, and it worked. Spray the nest as thoroughly as possible and run like hell. My son watched the proceedings from the comfort of our living room window. He said he didn’t know I could run that fast. I suggest spraying in the evening when they’re all sleepy and docile. The idea that they will send out a distress pheromone signal to their mates also leads me to advise that you should probably do it on a night when you have no plans to leave your home for the rest of the evening, and you might want to announce your plans to that neighbor who is tending to her garden. I might be overreacting here, or exaggerating the extent of the abilities of the wasp, but you might want to do your best to clear the entire area of any unsuspecting, potential victims who might be blamed by the wasps before spraying anything.
The miracle cure here, if you’re against spraying pesticides, is creating a mixture of some soapy substance (some prefer Dawn dishwashing solution) with water in a spray bottle. Make sure that that spray bottle has some distance capacity too, because you don’t want to be any closer than you have to be to spray these things. I haven’t tried this method, as I prefer the leading bee, wasp, hornet killing product from Raid that can achieve great distances. The Dawn method will not kill them instantly, but they will slowly suffocate to death. They apparently breathe through their skin and Dawn prevents them from doing so, if they are coated in it sufficiently. Beware the pheromone however, as they will send it out, and you or your neighbors are in serious threat of being stung multiple times if you’re not protected by bee protective gear, or you’re still around trying to douse them. Spray and run like hell was the method I employed on the wasp nest under the handrail on my sidewalk, and according to my son, I’m apparently still pretty fast … when fear is the accelerant.